Setting up and using the UDS-7IN1 with iPadOS and Stage Manager

Last Update: July 1st, 2026
Article ID: 1818501

Summary

This article explains how to connect the Plugable UDS-7IN1 docking station to a compatible iPad and use Stage Manager with an external HDMI display.

Stage Manager lets you organize apps into resizable, overlapping windows. On compatible iPad models, you can also move apps and windows between the iPad screen and an external display.

Applicable To

  • Plugable UDS-7IN1 docking station
  • iPad models with USB-C video output
  • iPadOS versions that support Stage Manager
  • HDMI monitors, TVs, or projectors

Requirements

  • Plugable UDS-7IN1 docking station
  • iPad with a USB-C port and iPadOS updated to the latest available version
  • USB-C cable included with the UDS-7IN1
  • USB-C power adapter, connected to the dock's USB-C Power Delivery passthrough port
  • HDMI cable
  • HDMI display

The UDS-7IN1 HDMI port supports up to 4K at 30Hz. Some iPad models and iPadOS versions can support higher external display resolutions through other adapters or displays, but the UDS-7IN1 hardware limit still applies when using this dock.

Answer

The UDS-7IN1 can be used with a compatible iPad to connect an HDMI display, USB accessories, Ethernet, SD or microSD cards, and power passthrough through one USB-C connection.

Stage Manager support and external display behavior depend on the iPad model and iPadOS version:

  • Stage Manager can organize apps and windows on the iPad screen.
  • Extended-display use, where apps and windows can move between the iPad and the external monitor, requires an iPad model that supports extended displays.
  • If an iPad does not support extended-display Stage Manager, the external display may mirror the iPad screen instead of acting as a separate workspace.

For the best experience, update iPadOS before setting up the dock:

  1. Open Settings.
  2. Select General.
  3. Select Software Update.
  4. Install any available iPadOS update.

iPad Models That Support Extended Displays

Apple's current iPad User Guide lists these models as supporting extended displays:

  • iPad Air (5th generation)
  • iPad Air 11-inch (M2, M3, and M4)
  • iPad Air 13-inch (M2, M3, and M4)
  • iPad Pro 11-inch (3rd and 4th generations)
  • iPad Pro 11-inch (M4 and M5)
  • iPad Pro 12.9-inch (5th generation and later)
  • iPad Pro 13-inch (M4 and M5)

Older iPad Pro models may support Stage Manager on the iPad screen but not extended-display Stage Manager. In that case, the HDMI display may mirror the iPad instead of allowing apps to move between screens.

Connect the UDS-7IN1 to the iPad

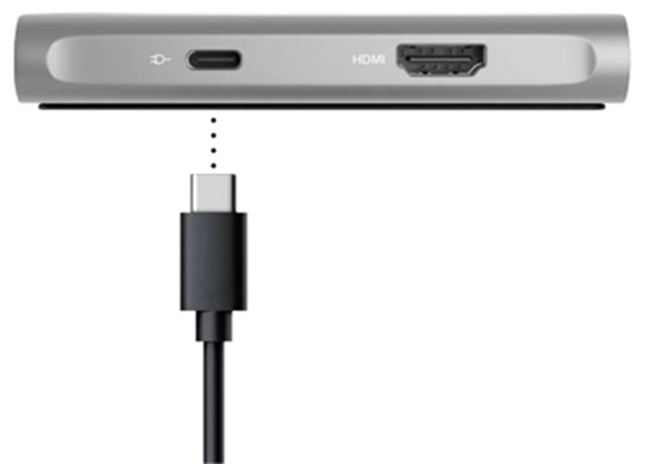
  1. Connect a USB-C power adapter to the rear USB-C Power Delivery passthrough port on the UDS-7IN1
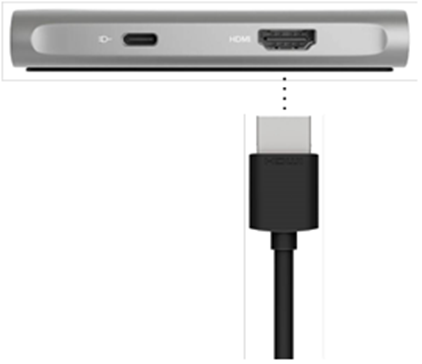
  1. Connect an HDMI cable from the rear HDMI port on the UDS-7IN1 to the HDMI input on the display.
  1. Turn on the display and select the correct HDMI input.
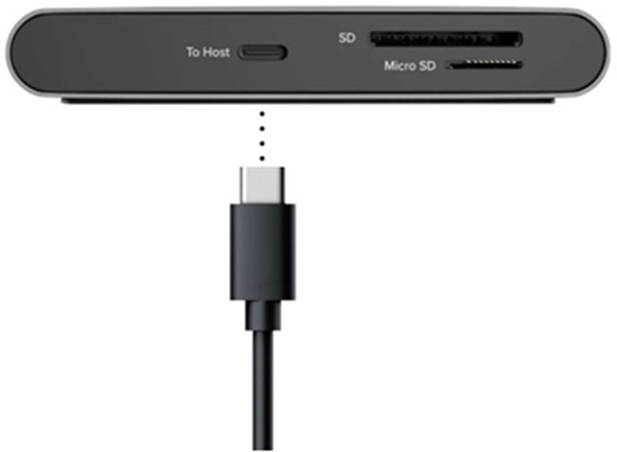
  2. Connect the included USB-C cable from the To Host USB-C port on the right side of the UDS-7IN1 to the iPad.
  1. Wait a few seconds for the iPad to detect the dock and external display.

Turn Stage Manager On or Off

On current iPadOS versions:

  1. Open Settings.
  2. Select Multitasking & Gestures.
  3. Select Stage Manager.

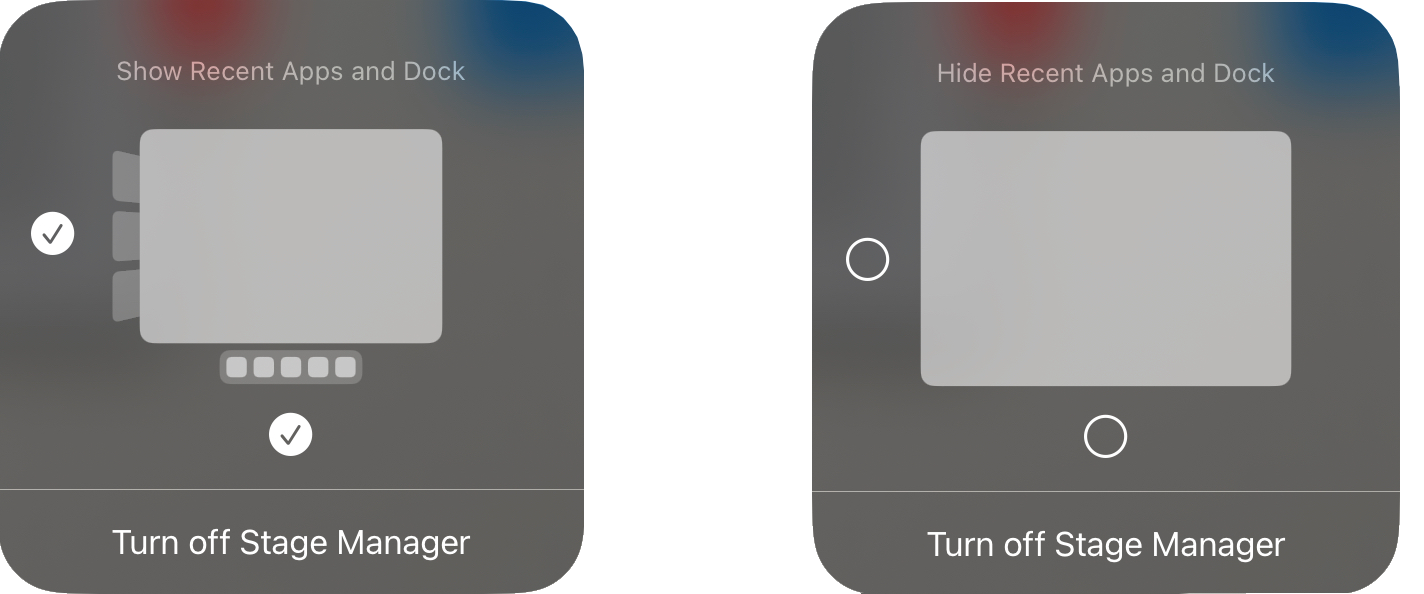
When Stage Manager is enabled, the current app or app group appears in the center of the screen, while recent apps appear along the left side.

Depending on your iPadOS version, you may also be able to turn Stage Manager on or off from Control Center:

  1. Swipe down from the top-right corner of the iPad screen to open Control Center.
  2. Select the Stage Manager control

Use the External Display

If your iPad supports extended displays, you can move apps between the iPad and the external monitor:

  • Use a connected mouse or trackpad to drag an app window by its top edge from one display to the other.
  • Select an app from the Dock or App Library on the display where you want to use it.
  • Open the app's multitasking menu, then choose Move to Display or Move to iPad when available.

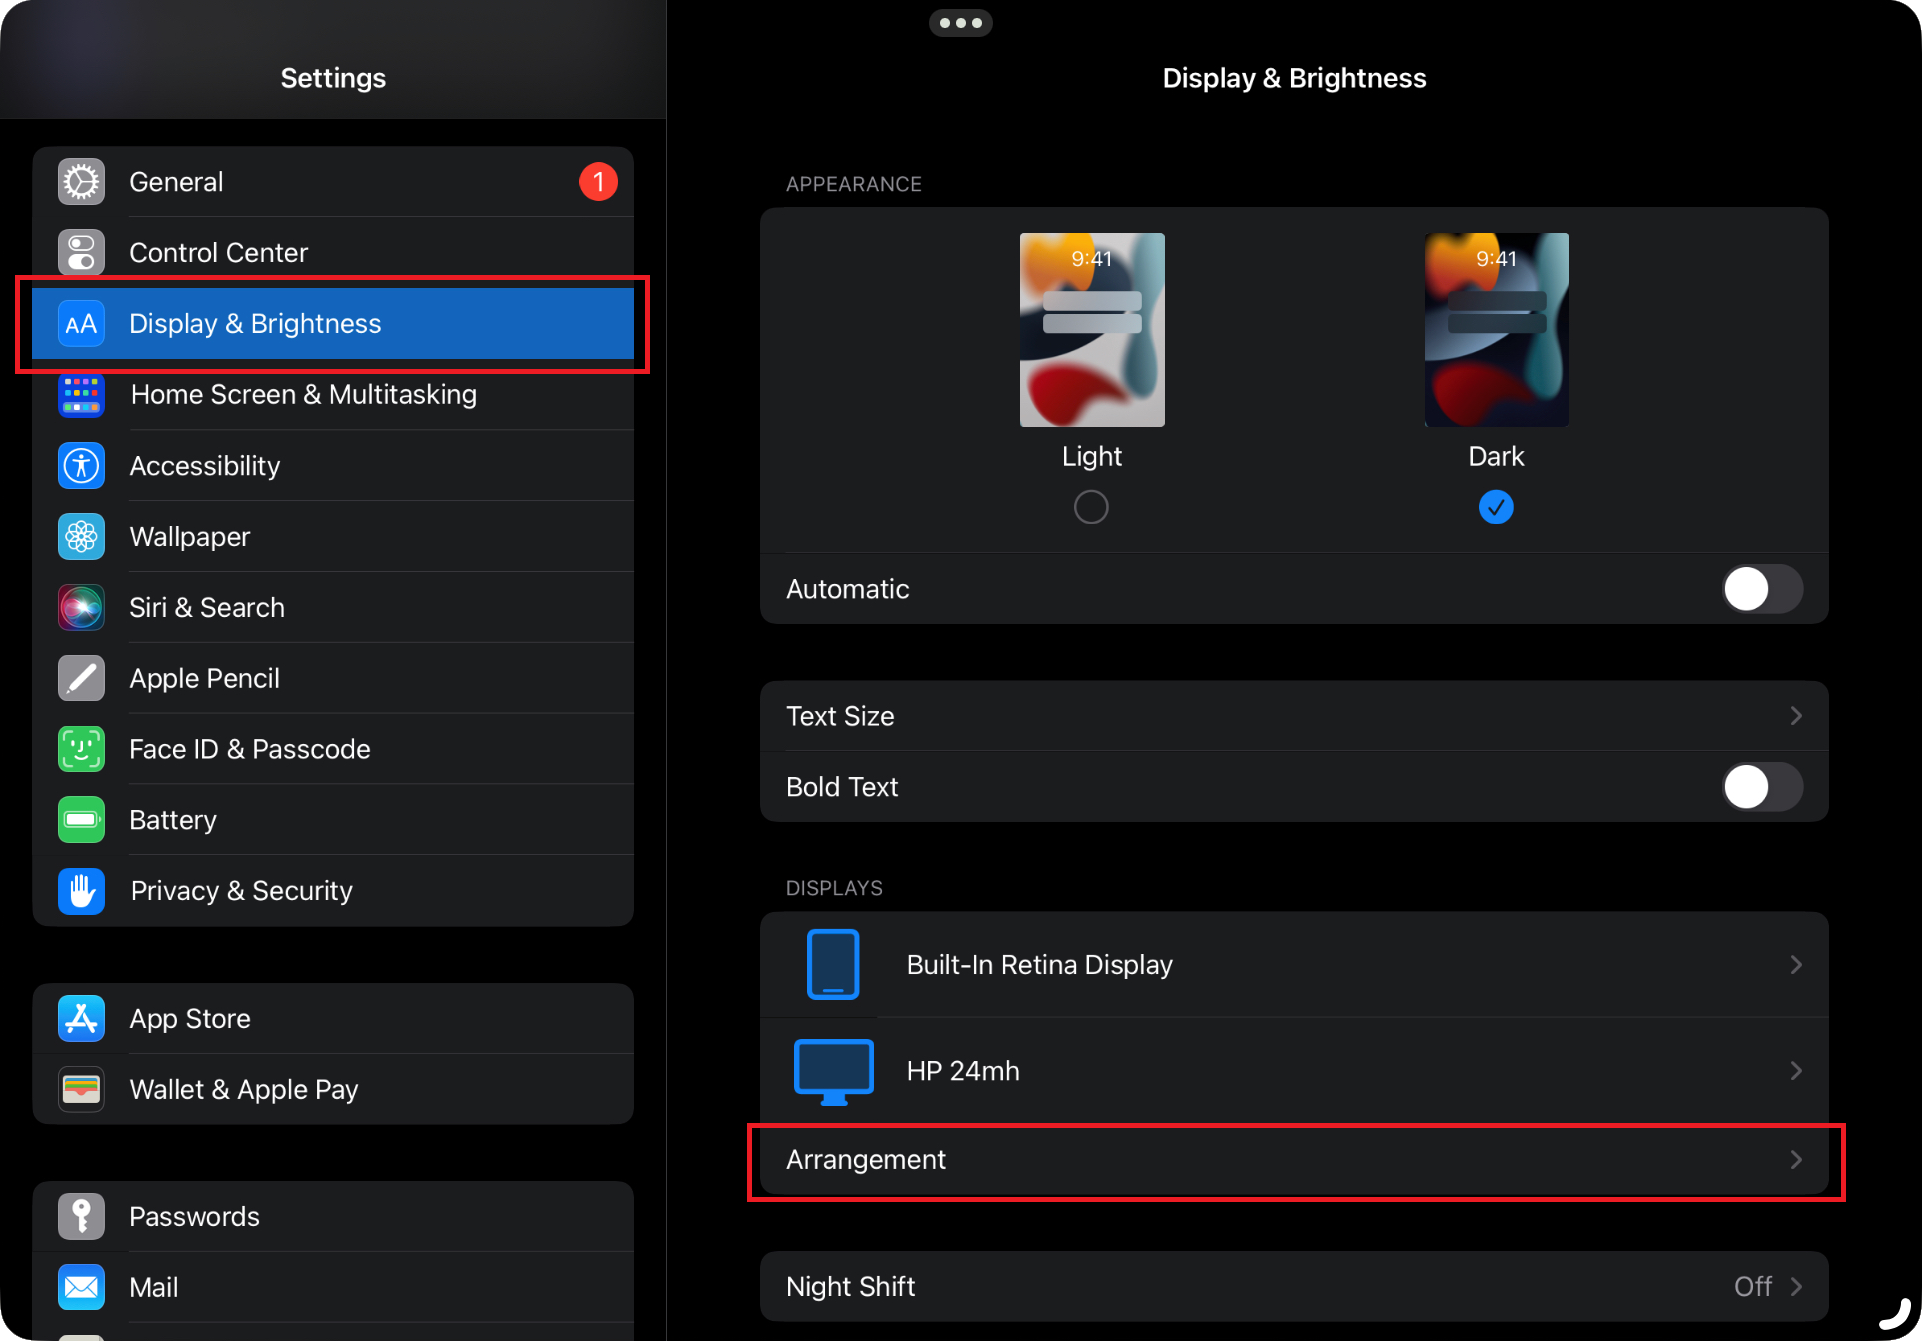
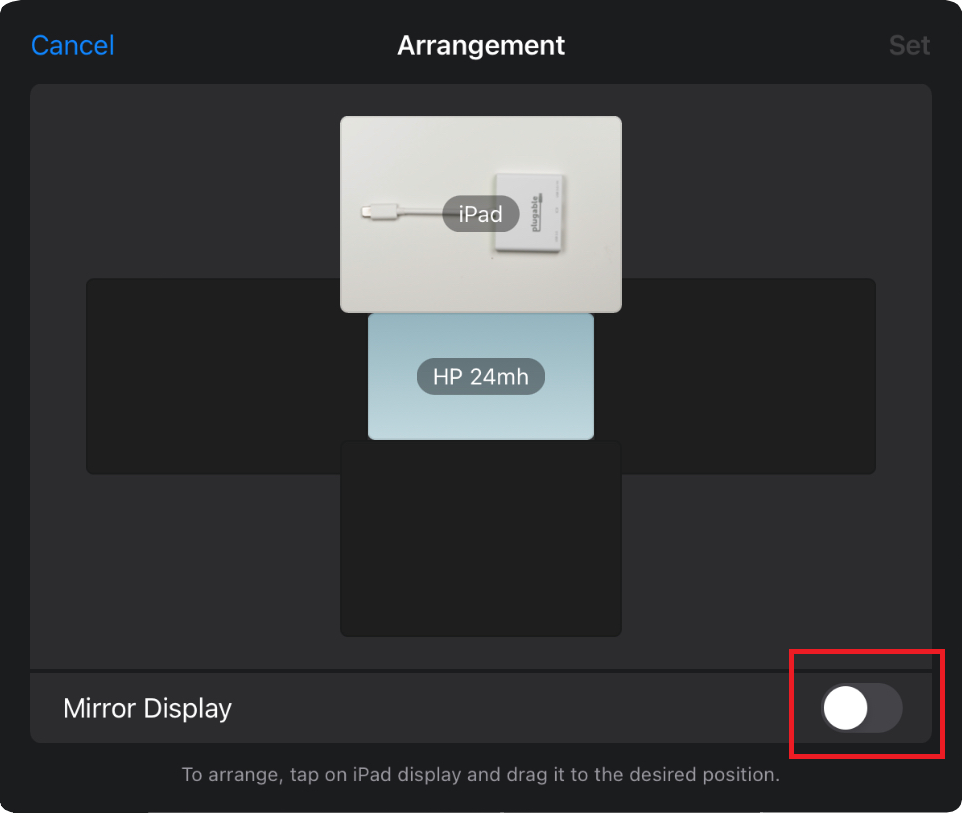
To change display arrangement or mirroring options:

  1. Open Settings.
  2. Select Display & Brightness.
  3. Select Arrangement.
  4. Turn Mirror Display on or off, if the option is available.
  5. Arrange the display positions to match your desk layout.

If the Arrangement option or Mirror Display setting is not shown, the connected iPad, iPadOS version, or display mode may not support that option.

Group Apps in Stage Manager

Stage Manager can group apps for a specific task or workflow.

To add an app to the current group:

  1. Open the first app.
  2. Drag another app from the Dock, App Library, or recent apps list into the center of the screen.
  3. Resize or reposition the windows as needed.

You can switch between app groups by selecting another app or group from the recent apps list, the Dock, or the App Library.

Show or Hide the Recent Apps List

On current iPadOS versions:

  1. Open Settings.
  2. Select Multitasking & Gestures.
  3. Select or deselect the Stage Manager recent apps option.

If the recent apps list disappears while you are resizing or moving a window, swipe in from the left edge of the screen to show it again.

Moving Apps between Screens

To drag an app between your iPad screen and external monitor,

  1. Tap and hold the top of the app window and move it from one screen to the other
  2. Tap the *** in the opened app and select "Move to Display"
  3. If you want to move an app simply tap and hold the app icon and drag it from one screen to the other

Use Display Zoom More Space

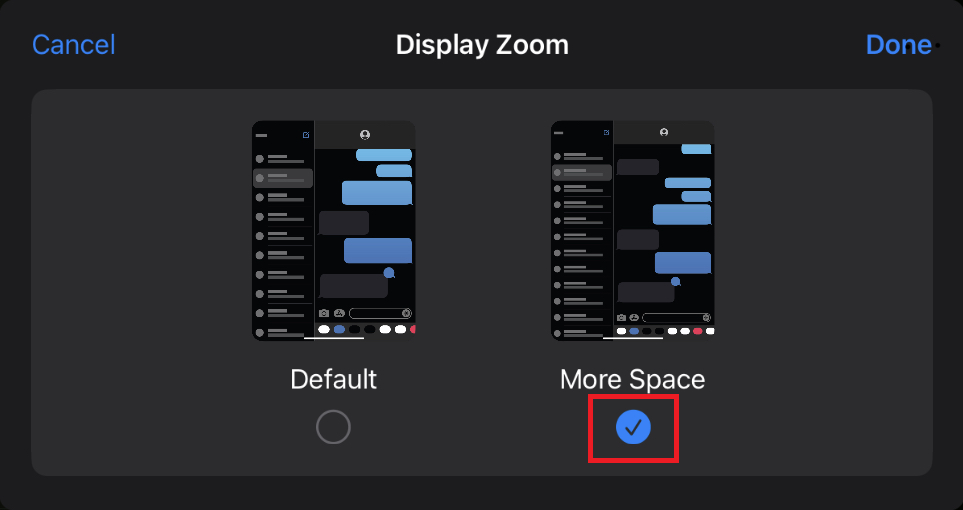
Display Zoom More Space can make text and buttons smaller so more content fits on the iPad screen. This setting is separate from Stage Manager and from the iPad Accessibility Zoom feature, but it may make the iPad screen feel less crowded when working with multiple Stage Manager windows.

To enable Zoom,

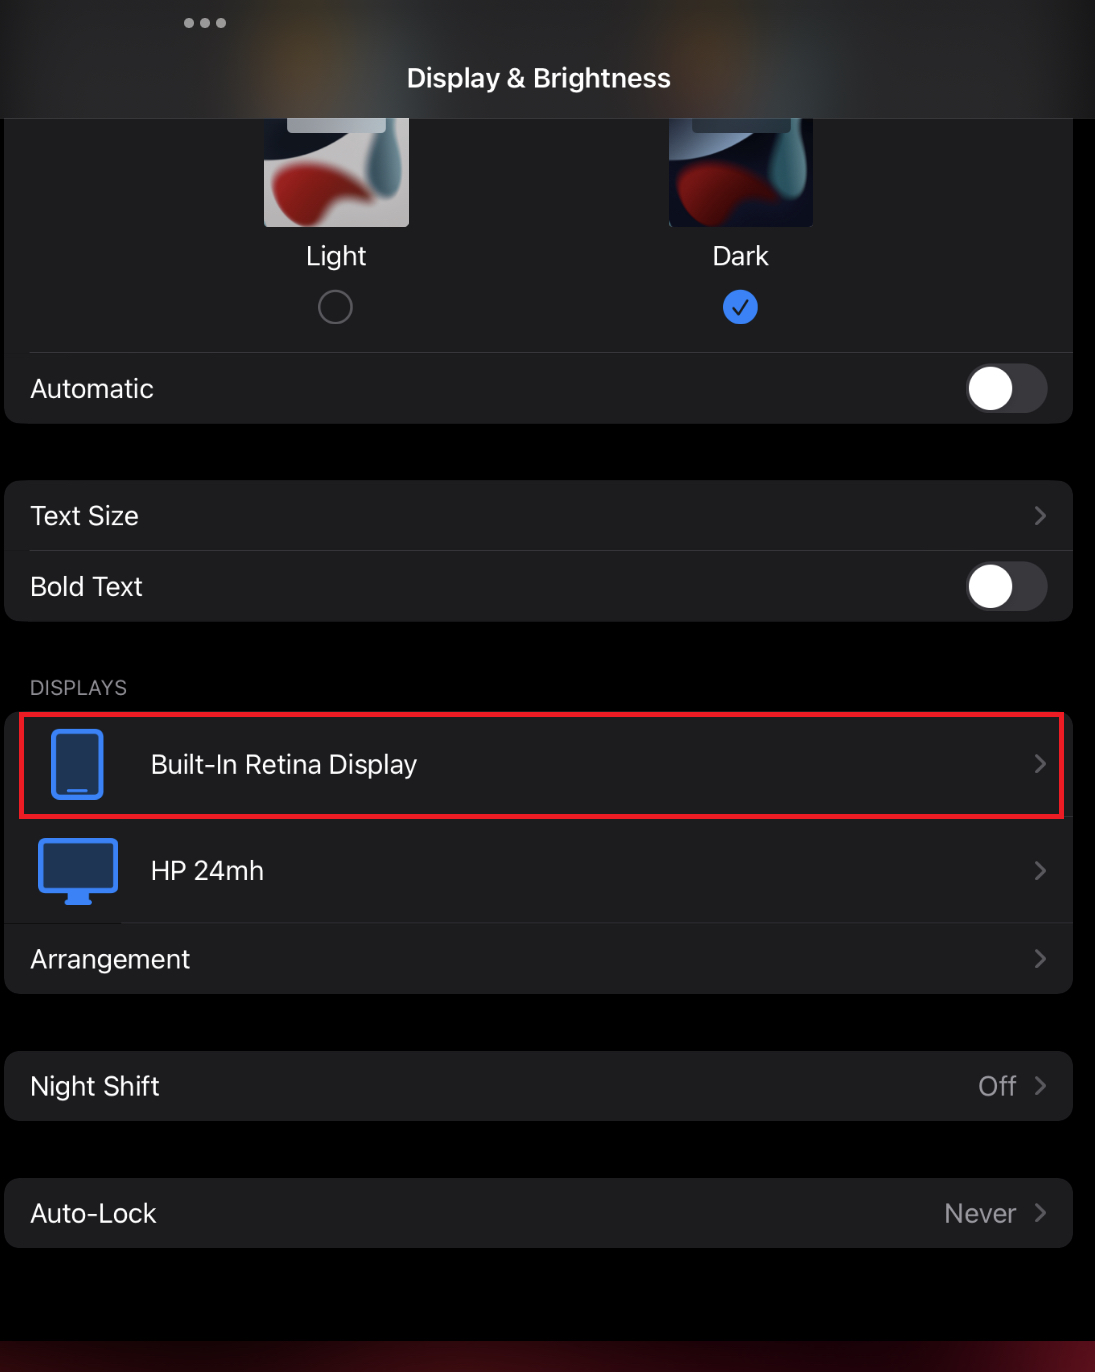
1. Open the Settings app on your iPad

2. Tap Display & Brightness

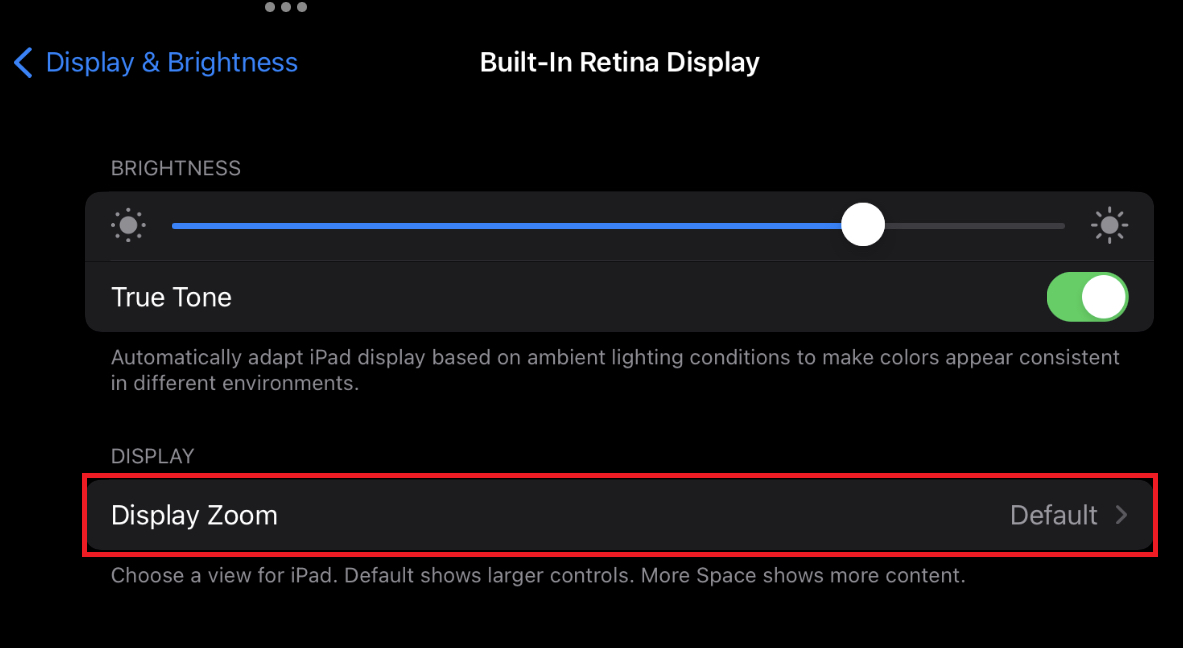
3. Tap Display Zoom

  • If your iPad shows separate display entries, tap Built-In Retina Display first, then tap Display Zoom

4. Select More Space from the list of options

5. Tap Done, then tap Use More Space if prompted

Troubleshooting

The external display is not detected

  • Confirm the HDMI cable is connected to the rear HDMI port on the UDS-7IN1.
  • Confirm the display is powered on and set to the correct HDMI input.
  • Disconnect and reconnect the USB-C cable between the iPad and the UDS-7IN1.
  • Disconnect the display from power for a few seconds, reconnect it, then reconnect the iPad.
  • Test with a different HDMI cable or HDMI input if available.

The display mirrors instead of extending

  • Confirm the iPad model supports extended displays.
  • Update iPadOS to the latest available version.
  • Open Settings > Display & Brightness > Arrangement and check whether Mirror Display can be turned off.
  • If extended-display options are not available, the iPad may only support mirrored output with this setup.

Apps will not move to the external display

  • Confirm the iPad model supports extended displays.
  • Confirm Stage Manager is enabled.
  • Try moving the app using the multitasking menu instead of dragging.
  • Some apps may limit window resizing or external display behavior.

The display resolution or refresh rate is not what expected

  • The UDS-7IN1 HDMI port supports up to 4K at 30Hz.
  • Available display modes depend on the iPad, iPadOS, HDMI cable, and display.
  • For 4K at 60Hz, use a Plugable dock or adapter that supports 4K 60Hz video output.

Need Assistance?

If you need help setting up the UDS-7IN1 with your iPad, contact Plugable Support at support@plugable.com. Please include your iPad model, iPadOS version, display model, and a brief description of what is happening.